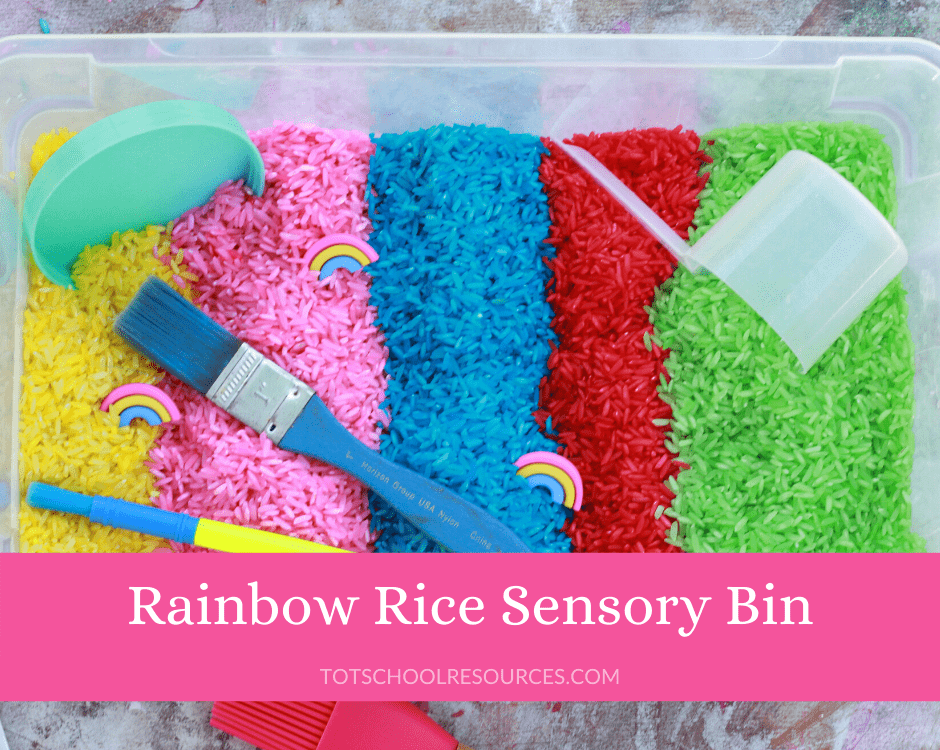
Rainbow Rice Sensory Bin
Rainbow rice sensory bins are a great activity for toddlers and preschool age kids. There are many different ways to dye the rice then you can set them free on an activity that stimulates the eyes and those tactile senses as well!
Rice dyeing is a super easy activity and we’ll cover several different ways to do it. Kids will love the bright, vibrant colors. They’ll love helping to make it too!
This post contains affiliate links. If you make a purchase after clicking one of my links I may earn a commission at no additional cost to you.
We’re big fans of sensory bins at my house. They’re great for scooping, hiding objects, or just providing a new activity when you’re desperate for them to entertain themselves for a while.
Unlike other rainbow activities, your rice bin won’t end up looking like brown mud (like playdoh and such does) since the colors will remain separate even when mixed together.
This sensory bin contains uncooked rice and should be done with some adult supervision. It’s not suitable for kids that still put everything in their mouth as you don’t want them eating a bunch of uncooked rice.
Rainbow Rice Supplies
Rice dyeing supplies
- Bag of white rice
- Food coloring
- Mason jars or other ziploc bags
We used regular food coloring for our rice. We also tried using gel coloring but our rice came out gummy…although that could have been due to my daughter squeezing a bit too much color on her rice. We laid it out in the sun and then let it sit overnight and it was still pretty gummy and stuck together.
Sensory bin supplies
You can use anything for actual sensory bin play but here are some ideas.
- Clear Plastic Bin (I prefer one with a lid so you can easily store your bin.)
- Scoops
- Brush
- Rainbow toys
Creating your bin
1 – Grab a bag of rice, white rice will color more easily. Pour small amounts into mason jars or small ziploc bags. I would start with 1/2-1 cup of rice in each bag.
2 – Add some dye to each bag in different colors. Don’t go too crazy because if your rice gets too wet it may get gummy. As my grandma always said you can add but you can’t take away.
3 – Now comes the fun part! Shake and mix the bags until all the rice is coated with color. If needed, add a few more drops of coloring to get all the rice coated.
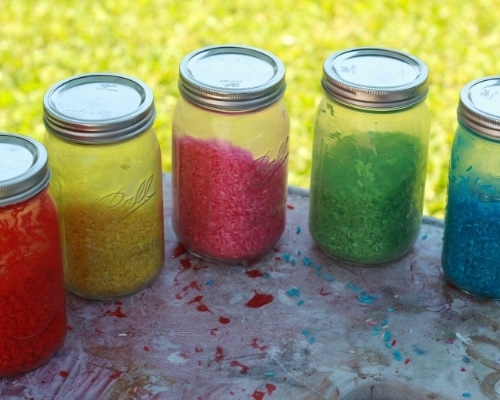
4 – Pour out onto paper plates and sit in the sun to dry, it should take about an hour but may take more or less time depending on how thick your layer of rice is.

5 – Once the rice is dry add it in a row one color at a time until all colors have been added.

6 – Add some scoops, brushes, little toys, whatever you want to use for your play and then set your kids loose.
Make sure you get your kids involved in making the bin. My 3-year-old loved squeezing in the colors, shaking the rice up, and pouring it out on the plates, although she kept saying it was food for birds lol.

Do I need vinegar?
You’ll notice we don’t include any vinegar in our ingredients list. We use only rice and food coloring when we color our rice and it works just fine.
However, there are many different ways to color rice. Let’s check out a few different methods.
How to color rice
There are so many ways to color rice!
Plain food coloring. We did ours with just plain old food coloring and it colored our rice just fine.
Food coloring with vinegar or rubbing alcohol. Many recipes call for using 1 cup of rice and adding 1/2-1 teaspoon of vinegar or rubbing alcohol along with the dye. I was never great at chemistry but from what I understand from poking around online these are supposed to help the dye to spread more easily and stick better resulting in more vibrant colors.
Just remember that vinegar is still taste safe but rubbing alcohol is not so keep that in mind when making colored rice for young kids.
Dyeing with paint. The other method I’ve seen is using watercolors or tempera paint to color your rice. Simply add a few drops of it to your rice just like you would food coloring.
It results in vibrant colors and you can make whatever shade you have the paint colors for while food coloring usually comes in more limited colors. This method is also not taste safe.
What’s the best method?
Truly the best method is going to be what works best for you and what supplies you have on hand. Better yet, make it a fun science experiment with your kids!
Try the different methods and then make up some methods of your own. Perhaps try using soda or koolaid to dye the rice too. Let your kids figure out which method they think works the best.
It’s a great learning experience and will easily stretch this simple sensory bin into a second project.

What’s the best way to store my rice?
The great thing about rice bins is they can be used again and again. Pick up what you can then simply vacuum up any remaining rice if you’re indoors.
Store your rice in an airtight container or ziploc bag. The rice is uncooked so you shouldn’t need to worry about it getting moldy so long as you didn’t use any food to color it. The only thing that could ruin your colored rice would be moisture which could cause mold or cause your rice to swell and clump together.
Pack it away and bring it out to play with again another day!
Learning Opportunities
STEM
Trying out different dyeing techniques can easily turn this simple sensory bin into a fun science project. Let them figure out which rice dyeing technique works best.
Sensory Play
Sensory play helps build nerve connections in the brain and is great for encouraging all types of development. Kids use their senses to explore and learn about their world so try to give them different tasks to stimulate different senses and in different ways.
I hope you enjoy your rainbow rice sensory bins!
Follow us on Facebook for more great crafts and activities for kids.


