Easy Wooden Christmas Tree Craft {for kids}
Making a DIY Christmas tree craft around the holidays is a no brainer. There are lots of easy Christmas tree crafts for kids.
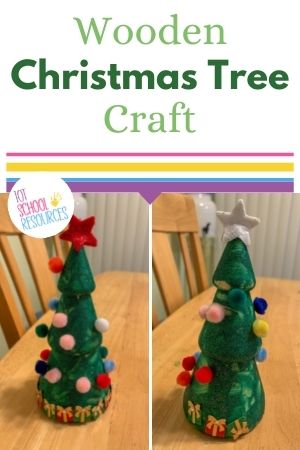
I love this wooden Christmas tree because it’s 3D and creates a little keepsake you can easily pack away and bring out again next year.

This post contains affiliate links. If you make a purchase after clicking one of my links I may earn a commission at no additional cost to you.
My kids had a blast making these wooden Christmas trees. We decorated these at 7am one morning because they were so excited to do it!
I did it with a 4 year old and a 2.5 year old. They did need help with the glue dots and such so it was something we did together.
Christmas tree craft supplies
- Wooden Christmas tree (Buy at Michaels/Buy on Amazon)
- Green paint (we chose one with glitter) – (Buy at Michaels/Buy on Amazon)
- Paint brushes
- Mini Pom Poms – 1cm (Buy at Target/Buy on Amazon)
- Glue Dots (Buy at Michaels/Buy on Amazon)
- Star Stickers or construction paper (Buy at Michaels/Buy on Amazon)
- Optional: Present stickers
I’ve included links to what we used or similar items. Some of these items are seasonal so you may find slightly different variations in different years.
I found our unfinished wooden trees in the dollar spot at Target which is what gave me the inspiration for this craft!
If you can’t track down wooden trees you could also use paper cones or styrofoam cones to make your Christmas tree craft.
Directions
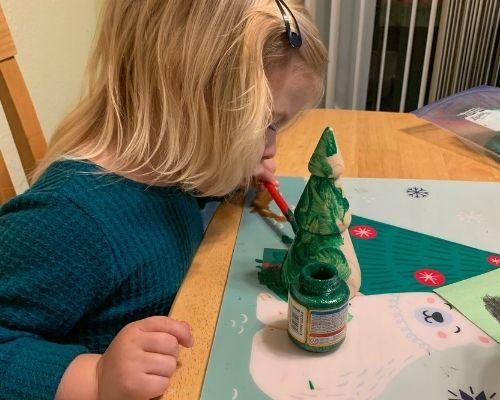
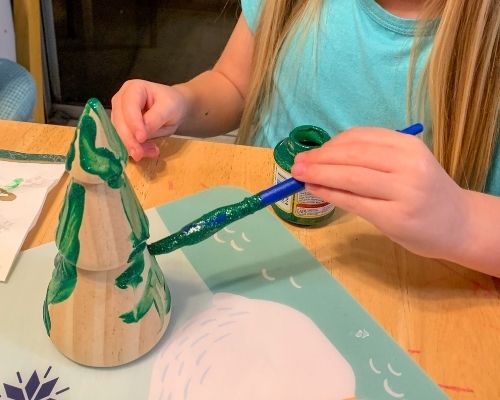
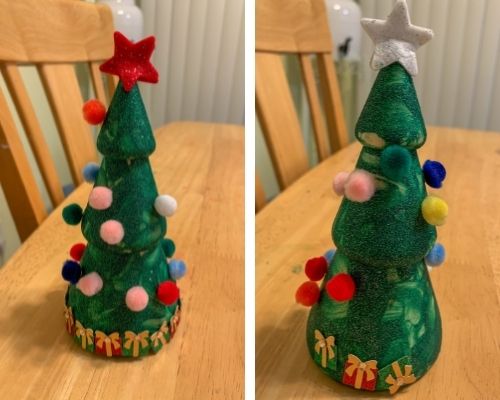
1 – The first thing you’ll need to do is paint the entire wooden Christmas tree green. We used glitter paint for ours.
It may take a while for it to dry. We painted ours one night after dinner and then did the decorating the next day.
2 – Once the paint is dry it’s time to decorate. We started with the star on top of the tree.
For the stars you can use 2 foam or felt star stickers. Line them up on opposite sides and press them together.
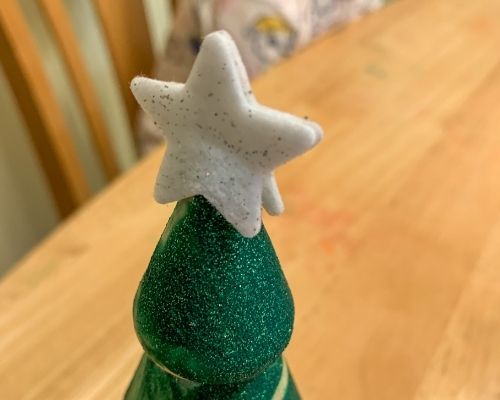
If you don’t have star stickers you could cut your own stars out of construction paper or felt and glue them together.
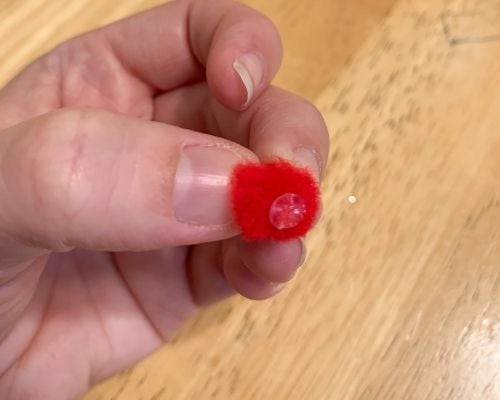
3 – Next you need to add some ornaments to your tree. You’ll need mini ornaments and glue dots for this.
We used small glue dots for ours but I wish we had slightly larger dots so I recommend trying the medium size glue dots paired with mini pom poms.
Place a glue dot on the back of each pom pom then stick it to the tree. Since glue dots are very sticky I prepped the pom poms and then they stuck them on their trees.
You could also use hot glue to attach the pom poms but that would take more adult participation.
We did find that some of our pom poms fell off after a while and had to be reattached. Hot glue or quick drying liquid glue would certainly solve this issue.
4 – You can be done with your trees now, or you can use present stickers to add gifts to the bottom of your tree.
You can use glue dots or regular glue to attach them. The stuff on the back of the stickers may or may not be strong enough alone.
Ours turned out super cute! The one with the red star was done by my 4 year old and the white star was done by my 2.5 year old.
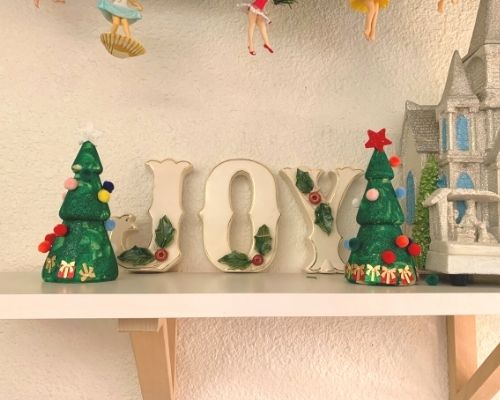
Now they are proudly displayed alongside our other Christmas decor.
I made sure to write their name and the year on the bottom in case we decide to store them away with all the other Christmas decorations.
Learning Opportunities
Most holiday crafts I do with my kids just because I love holiday crafts. But crafting can almost always involve some learning opportunities for kids as well.
Fine Motor Skills
This craft deals with placing some small items on the tree so it’s a good opportunity for practicing fine motor skills.
Even my 4 year old got some practice trying to carefully place the presents just so.
Have fun creating your own DIY Christmas trees and tag us is photos of your creations on Instagram @totschoolresources
Visit the Christmas page for more fun holiday crafts & activities!